
Desserts
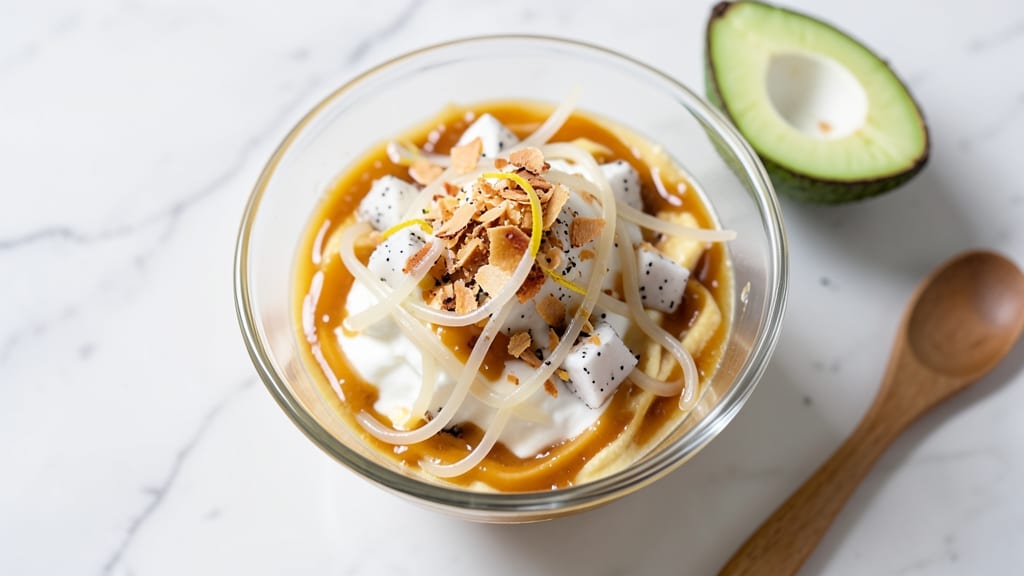
This buko salad ice cream recipe brings the beloved Filipino dessert into creamy, frozen form—where chewy nata de coco meets rich leche flan and sweet coconut milk. 🌴 The magic happens when we blend tropical ingredients into a smooth base, then layer it with gelatin for that signature buko salad texture, all while keeping it light enough to scoop.
I developed this after craving something familiar yet exciting, and it became an instant crowd-pleaser at gatherings.
The secret lies in balancing textures: tender coconut gel, creamy leche flan, and chewy nata de coco all come together in every bite. Unlike traditional buko salad, this version transforms into a scoopable dessert that’s perfect for hot days or as a showstopping finale to any meal.
The recipe uses simple techniques—blending, chilling, and layering—but delivers restaurant-quality results with minimal effort.
What makes this recipe special is its versatility. You can keep it classic with young coconut and leche flan, or experiment with ube or pandan for vibrant flavors. The gelatin step ensures the nata de coco stays intact, while the condensed milk adds just the right amount of sweetness.
Each spoonful delivers that nostalgic Filipino taste, now in a refreshing, frozen format.
Serve it in small bowls with extra nata de coco on top, or let it melt slightly for a saucy texture. The best part? It’s easy to make ahead and stays creamy in the freezer for up to a week. Let’s create this tropical twist on a Filipino classic!
Ingredients for buko salad ice cream
Tropical ingredients blend into creamy, chewy frozen perfection—no ice cream maker needed.
| Ingredient | Amount | Notes |
|---|---|---|
| Nata De Coco (Coconut Gel) 🥥 | 1 package (14 oz) | Pre-rinsed, drained well |
| Sweetened Condensed Milk 🥛 | 1 can (14 oz) | Full-fat for creaminess |
| Coconut Milk 🥥 | 1 can (13.5 oz) | Full-fat preferred |
| Unflavored Gelatin 🍬 | 2 tsp | Powdered, not sheet |
| Granulated Sugar 🍚 | ½ cup | Adjust to taste |
| Young Coconut (Optional) 🥥 | 1 small | Shredded, about 1 cup |
| Leche Flan Mix 🍮 | 1 box (5.3 oz) | Or homemade flan base |
| Heavy Whipping Cream 🥛 | 1 cup | Full-fat for best texture |
| Vanilla Extract 🌿 | 1 tsp | Pure vanilla preferred |
| Orange Juice 🍊 | ¼ cup | Freshly squeezed |
| Salt 🧂 | ¼ tsp | Fine sea salt |
| Water 💧 | ¼ cup | For gelatin activation |
| Shredded Coconut (Optional) 🥥 | ¼ cup | Toasted for garnish |
The nata de coco is the star—look for bright white, jelly-like strands in the refrigerated section of Asian markets. Filipino supermarkets often carry it pre-packaged, but if you find it in bulk, rinse it well to remove excess liquid. For the leche flan mix, Goya or Knorr are reliable brands, but homemade is even better if you've got the time. The young coconut? Canned is fine, but fresh is worth hunting down at specialty stores—just peel it carefully. If you can't find it, skip it; the recipe still works beautifully.
No nata de coco? Extra coconut milk plus a splash of lime juice adds a similar texture. Swapping the leche flan mix for vanilla pudding mix works too, but you'll lose that authentic flavor. The gelatin is crucial—it keeps the nata de coco intact. If you don't have powdered, sheet gelatin soaked in warm water works the same. For the coconut milk, full-fat is non-negotiable—it's what gives this dessert its rich, creamy mouthfeel. The orange juice can be bottled, but freshly squeezed has a brighter punch.
Prep ahead: mix the gelatin with water first, then let it bloom for 5 minutes before heating. The base keeps for 3 days in the fridge before freezing—perfect for meal prep. Once frozen, let it sit at room temperature for 10-15 minutes before scooping. Store leftovers in an airtight container for up to 2 weeks—it actually improves in flavor as it ages. For serving, a light sprinkle of toasted coconut elevates the presentation without overpowering the tropical notes.
Why You'll Love This Recipe
- No-Fuss Mixing: I swear by this recipe because it’s just layering—no blending, no overworking, no stress. You’re basically building a parfait in a bowl: gelatin sets the creamy base, condensed milk adds that caramelized richness, and the buko adds that perfect chewy bite. Honestly, the hardest part is waiting for the gelatin to chill.
- Creamy-Chewy Magic: That contrast? Unreal. The gelatin gives it a silky, almost mousse-like texture, while the buko stays delightfully firm—like biting into a cloud with a little resistance. And the coconut milk? It’s not too heavy, just enough to make every spoonful feel like a tropical hug.
- Party in a Bowl: Between us, this is my go-to for potlucks, birthdays, or just because. It’s light enough to serve as dessert after a heavy meal but hearty enough that no one skips it. Plus, the colors? Bright, pretty, and instant Instagram-worthy—no fancy plating needed.
- Stays Fresh, Costs Less: The gelatin keeps it solid for days in the fridge, so I make a big batch and portion it out. And budget-wise? A can of condensed milk and a bag of buko stretch farther than you’d think—way cheaper than buying individual desserts. (Yes, even on a Tuesday night.)
Step-by-step instructions for buko salad ice cream
Here's how to transform classic buko salad into creamy, dreamy ice cream.
🍳 Step 1: Prepare the Flan Base
In a medium saucepan, combine the 1 box (5.3 oz) leche flan mix, 1 can (14 oz) sweetened condensed milk, 1 can (13.5 oz) coconut milk, 0.5 cup granulated sugar, 1 tsp vanilla extract, and 0.25 tsp salt. Whisk over medium heat until the mixture reaches 160°F—about 10-12 minutes. You'll see it thicken into a smooth, custard-like consistency.
This flan base forms the creamy foundation of your ice cream. I like to taste it at this stage—it should be sweet but not cloying, with a perfect balance of coconut flavor. Remove from heat immediately once it reaches temperature to prevent curdling.
🥘 Step 2: Incorporate the Nata De Coco
Drain the 1 package (14 oz) nata de coco thoroughly and pat it dry with paper towels to remove excess moisture. Gently fold the drained nata de coco into the warm flan mixture using a silicone spatula. Work carefully to avoid breaking the strands—you want them to remain chewy and intact.
Here's where the texture magic happens. The warm flan mixture will help the nata de coco absorb the creamy base while maintaining its signature chewiness. If you're using the optional 1 small young coconut, shred it now and fold it in along with the nata de coco. The coconut adds a delightful crunch that contrasts beautifully with the chewy nata.
🍳 Step 3: Activate and Dissolve the Gelatin
In a small bowl, sprinkle the 2 tsp unflavored gelatin over the 0.25 cup water and let it bloom for 5 minutes until it forms a gel-like consistency. Meanwhile, chill the flan mixture in the refrigerator for 1 hour until it's completely cold but still pourable.
Once bloomed, gently heat the gelatin mixture in the microwave for 10-15 seconds until fully dissolved. Slowly pour this gelatin solution into the chilled flan mixture while whisking continuously. The gelatin will help create a smoother texture and prevent ice crystals from forming later. Whisk until fully combined and smooth.
🥘 Step 4: Add the Cream and Final Touches
In a separate bowl, whip the 1 cup heavy whipping cream until it forms soft peaks. Fold this whipped cream into the flan mixture along with the 0.25 cup orange juice. The orange juice adds a bright, citrusy note that cuts through the richness of the coconut and flan. Fold gently to maintain the creaminess without deflating the whipped cream.
This is the moment that matters: the texture transformation. Your mixture should now be thick but still spoonable, with a luxurious, pudding-like consistency. If you're using the optional 0.25 cup shredded coconut, toast it lightly in a dry pan first for about 2 minutes until golden, then fold it in now. The toasted coconut adds a wonderful aroma and texture contrast.
⏰ Step 5: Freeze for Perfect Texture
Pour the mixture into a loaf pan or airtight container, smoothing the top with a spatula. Cover with plastic wrap pressed directly onto the surface to prevent ice crystals from forming. Freeze for 6 hours or until completely firm.
For the best texture, remove the ice cream from the freezer 10 minutes before serving. Use a fork to gently break up any ice crystals that may have formed on the surface. The result should be creamy, dreamy buko salad ice cream with chewy nata de coco strands throughout—each bite delivers that perfect balance of textures and tropical flavors.
Pro Tips For Making Buko Salad Ice Cream
- Rinse the Nata First: Drain the nata de coco and give it a quick rinse under cold water before mixing—it removes that weird, slightly bitter residue that clings to store-bought packs. I used to skip this, and the texture always felt off, like eating a coconut sponge with a hint of regret.
- Bloom Gelatin Cold: Sprinkle the gelatin over ice water instead of hot liquid—it blooms faster and more evenly, preventing clumps that turn your ice cream into a gritty mess. I learned this the hard way after straining three batches through a sieve.
- Chill the Base Hard: Freeze the condensed milk-coconut milk mix in a shallow tray for 2 hours before blending—it cuts the gelatin’s working time in half and keeps the final texture silky, not icy. Yes, it’s an extra step, but your spoon will thank you later.
- Sweeten Gradually: Taste the blended mixture before adding all the sugar—condensed milk is already sweet, and you’ll end up with something syrupy if you dump in the full amount. Start with half, let it set, then adjust. Trust me, your taste buds will notice the difference.
Storing and reheating your buko salad ice cream
Freezer Storage Tips
Transfer your buko salad ice cream to an airtight container with a tight-fitting lid—glass or BPA-free plastic works best. Press plastic wrap directly onto the surface before sealing to prevent ice crystals.
Store for up to 2 weeks at 0°F or below for optimal texture. The flavors actually deepen over time, so it’s perfect for meal prep. 🥥
Thawing Without Melting
For a quick serve, remove the container from the freezer and let it sit at room temperature for 10-15 minutes. If you need to speed things up, place it in the refrigerator for 30-45 minutes before scooping.
Never microwave—it destroys the delicate textures. The ideal serving temp is just firm enough to hold its shape but soft enough to scoop easily.
Reheating for Saucy Texture
Want a saucy, semi-frozen version? Let individual portions sit at room temperature for 20-30 minutes until slightly melted. Stir gently to redistribute the nata de coco strands. This works beautifully for dipping waffles or pancakes. The warm creaminess contrasts perfectly with the chewy nata, creating a restaurant-worthy experience.
Reviving Grainy Texture
If your ice cream develops ice crystals, don’t toss it! Let it sit at room temperature for 10 minutes, then use a fork to gently break up the crystals.
For extra creaminess, add 1-2 tablespoons of coconut milk and stir well before refreezing. The gelatin helps prevent this, but sometimes temperature fluctuations happen—especially if your freezer isn’t consistent.
Portioning for Convenience
Divide the mixture into silicone ice cube trays or small containers before freezing for perfect single-serving portions. This is especially helpful if you’re serving at parties or potlucks.
Once frozen, transfer the portions to a sealed bag for easy grab-and-go serving. The individual servings thaw faster and maintain their texture better than large blocks.
Long-Term Freezing
For storage beyond 2 weeks, transfer to a vacuum-sealed bag to extend freshness up to 3 months. Remove as much air as possible to prevent freezer burn. Label with the date—trust me, you’ll forget how long it’s been in there!
When ready to serve, let it thaw in the fridge overnight for the best texture. The nata de coco stays chewy and intact even after months of freezing. ✨
Nutrition facts
Frequently asked questions
Can I make this without gelatin?
The gelatin is key for maintaining the chewy nata de coco texture in frozen form. If you must omit it, reduce the coconut milk to ½ can and add 1 extra tablespoon of cornstarch to thicken the mixture. However, the nata de coco may turn mushy after freezing—this recipe relies on gelatin for that signature texture.
How do I get the nata de coco to stay intact?
Work gently when folding the nata de coco into the warm mixture—use a silicone spatula to avoid breaking the strands. Chill the base completely before adding gelatin, and freeze immediately after mixing. The gelatin helps "lock in" the texture, but handling it carefully from the start makes all the difference.
Can I use store-bought ice cream base?
Yes! Replace the homemade flan mixture with 1 quart vanilla ice cream base (like Breyers or Häagen-Dazs). Add the nata de coco and gelatin as directed, then freeze. The texture will be slightly softer, but it's a great shortcut for busy days. The tropical flavors still shine through!
Why does my buko salad ice cream taste too sweet?
The condensed milk and gelatin are likely the culprits. Reduce the sugar by ¼ cup and taste the flan mixture before adding nata de coco. If it's still too sweet, balance it with 1 extra tablespoon of orange juice—the acidity helps cut through the sweetness naturally.
How can I make this vegan?
Swap the gelatin for agar-agar powder (2 tsp)** and use coconut cream instead of heavy cream. Replace the leche flan mix with a vegan vanilla pudding mix. The texture will be slightly firmer but still delicious—just fold in the nata de coco at room temperature for best results.